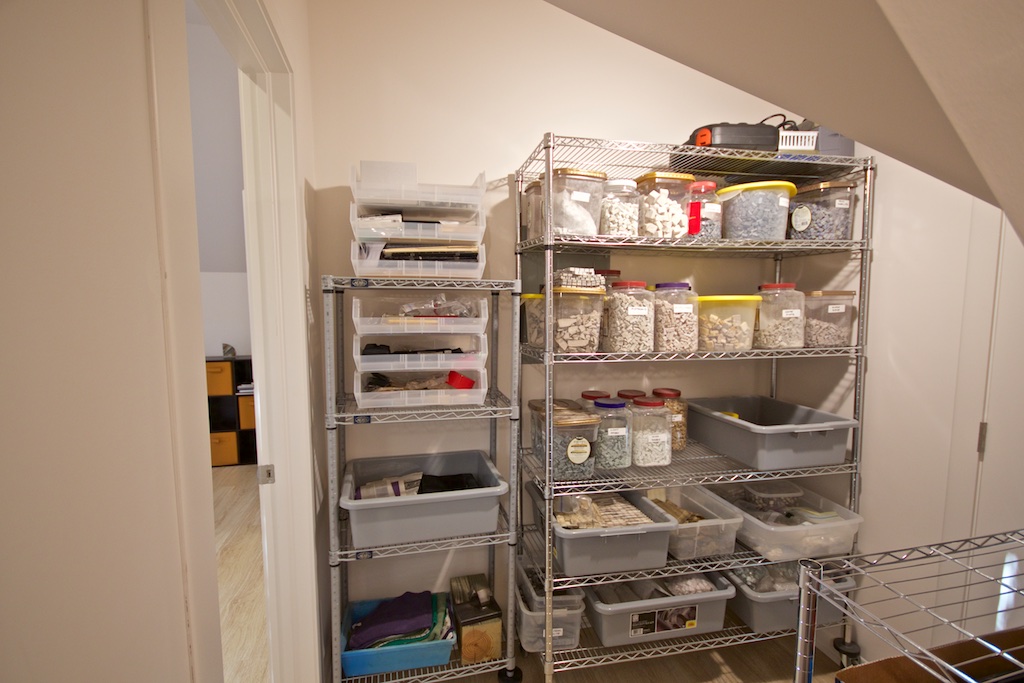
Self Portrait

I finished it!

I drug this old project out of the closet almost 2 years ago. Hold on, a bit of history may be in order first. About 7 years ago, I was not even 1/8th of the way through this project before I realized that I was on the wrong track. So I did what any normal person would do in such a situation and I got busy with other things. However, not ready to abandon the original idea, I just put the piece away in a closet.

Self Portrait (2016) 30" x 30" | 76cm x 76cm. Marble, mosaic gold, smalti, Swarovski crystal

A couple+ years ago, I was cleaning my studio and deciding what unfinished projects to give up on and which ones to consider finishing. I decided to give this project another go and rethought it. I came up with a strategy that would better support the original concept, and also give me an opportunity to improve my hammer-cutting skill. I tested out the idea on a small corner and decided that it was a good way to go.

Long story short: Got into a bad place with my work, took sabbatical, sabbatical turned into quasi-sabbatical which allowed finishing old stuff but not trying new stuff, decided to plug away on this project while new studio renovation was underway, halted work on project—then 1/2 finished—for renovation, resumed work a few months ago after moving into new studio, finally finished it! So, I guess you could say that this has been a 10-year project.

Well, of course, I am not quite sure how much I do or don't like it, although I think the side perspective is pretty cool!. By the time I resumed work on it in the new studio, I was wishing that I had decided on turquoise instead of red but, alas, that ship had sailed, so to speak. The main thing, however, is that I finished it! And I have greatly improved my hammer-cutting skill. So, good deal. Very good deal! And my first project finished in my new studio!

I've yet to frame it but here it is. Please forgive the photo quality.


A Look Back

A dear friend of mine sent me a photo this morning, a photo which took me back in time.

So many years ago, Carole wanted me to make an elephant mosaic for a triptych frame that she had bought. This had to be over 15 years ago—certainly in my early mosaic days. 

The first pic shows the 3 small panels in the frame. The other pic, which my friend just sent me this morning, shows the panels, minus the frame, as they hang in her new place in Houston. As I recall, I mosaicked the original masonite backing panels that came with the frame.

It's interesting to look at old work.

Before I Was An Artist, #11

With summer travels and home renovation, things have been incredibly busy the past few months. But the renovation is mostly finished and my new studio is operational. If you would like to see my new space, check out this blog post

After a few very small mosaic tasks, I'm almost ready to rejoin the mosaic world and focus on finishing a couple of works. My sabbatical turned quasi-sabbatical and then back to full sabbatical during the renovation has been very good for me. This blog series, as well, has been helpful, and I feel it will be even more helpful if I continue it.

So, we left off in about 2006 with the idea of essential mosaic, or work that is uniquely mosaic. My first introduction to the concept was by Gary Drostle, who described it as work that would not be as successful in any other medium. I'm pondering a tighter qualification, that being work that can only be successful in mosaic. What do you think?

As the riddle of essential mosaic nagged at me, I attempted to chase it and began creating abstract mosaics and working with a variety of materials. I came to realize that I love line. And simplicity of design. And minimal color palette. And precision.

Simplicity of design and minimal color palette gave me a sense of space. Precision gave me a sense of ease, which actually sounds nonsensical as precision is not at all easy. But precision made things make sense, made the pieces make sense to each other—to meet on equal terms, made silence instead of noise. I still feel the same way today, although I now understand how precision is vulnerable to perfectionism. 

In this time period, I was paying more attention to texture and was experimenting with dimension. I also began thinking in terms of works in series. Music To My Eyes was the first series, based on classical music forms and particular compositions in the form, as well as the use of mosaic gold to express movement.

Below are the first two in the series, Etude and Nocturne, 2007 and 2009, respectively

Mosaic gold is quite unique and extremely responsive to light. The texture and shadow inherent in hand-cut glass and stone are also unique to mosaic. But, are these essentially mosaic? Would they be as successful in any other medium? 

Another series was called Vertical, but it is now called Lines. I was inspired by Brit Hammer's textural mosaics which were worked in lines, or as she referred to them, stripes. She worked mostly in glass and with a lot of color, and in a more relaxed style. Of course, I loved the idea of working linearly, but I did not want to copy her; I had to make it my own. 

Below are two early pieces from the Lines series:

At left is the first piece in the series, Pulse, 2008I was experimenting with a much wider range of materials and also with beads.

It was mostly easy to work monochromatically, in black, gray, and white, but combining the matte marble/stone vs the more highly saturated glass was a challenge that I would increasingly face as I tried to work with more color later on. 

Also, I did not want it to look like stripes, which presented the biggest challenge, both technically and compositionally, in changing materials—going from smalti-sized tess to very small beads.

In retrospect, I think that the best thing about this series was that I worked with so many different materials and learned a lot about how they work together, and sometimes how they didn't.


At right is another in the Lines series from 2008, Rhythms: September. For this Rhythms sub-series, I made an 8" x 8" mosaic for each month of 2008 in this Lines style

What do you think? Did I make my own lines, distinctive from Brit Hammer's? And is this essentially mosaic? Would these pieces work in anything but mosaic? 

During this time period of 2007 - 2009, I was working a lot and consciously trying to make art. I guess you could say that I was being an artist

Over time, as I was being an artist, I was increasingly taking myself more seriously, which just might be at the heart of my struggle with being an artist.  Part of the reason for this, I have come to realize, had to do with my increased awareness of and interaction with the—thanks to the internet— quickly expanding mosaic world. 

That's enough for this post. I'll continue with around 2010 in the next post. Thank you for following!

Studio Wing, WIP (cont.)

Gosh, it's been some time since my last post, hasn't it! The summer has been busy, and here we are into fall already. Let me give an update on my new studio wing.

The studio is finished and ready for work, minus a bit of decor/furniture, and I'm getting settled in. I'm very happy with so many things about it and, although I'm not quite ready to really dig in on a new art project, I've got several things in the queue. More on that in a bit. For now, how 'bout some pics? I've included a few before pics because the transformation is just so dramatic.

Hint: Hover over the images for descriptions.


As to what's in the queue? First up is to repair a table top that I made over 15 years ago, probably more like 18 years ago. I made it for one of my kids, who shall not be named-and-shamed here, and who seemed to forget that it was an interior mosaic and put it outside a couple of years ago. I'm reworking the edge, replacing all the tiles. 

My next project will be a small backsplash for the studio bath vanity. It's a small bathroom and I don't want anything too busy or complicated. I predict it will be a rather boring project. 

After taking care of these two small tasks, I plan on spending some time finishing a few projects. It will be some time before I start something new, but I've got plenty of ideas for when I'm ready.

Okay, so that's where all things studio stand at the current time. My next and final photo shoot will probably be after the new year. By then, I hope to have furniture and decor figured out. 

Studio Wing, WIP (cont.) — PLEASE HELP!

I'm starting to think of organization for my materials in my new studio. I'll have shelves that line the long sides of the studio, probably enough shelving for my smalti (both Mexican and Italian), and vitreous, as well as all my stone, ceramic, other glass, etc. I'll be using clear jars for the tess. In my old studio, I organized colors within material, with only the most-used materials in the immediate studio area. I've got plenty of room in the new studio to have it all—or at least most of it—on the shelves along the walls, so I'm considering how I should group things.

Question: Group materials by color within material, or by material within color?

Color within material: For example, I would have the vitreous grouped together I'm one area, the Mexican smalti together, the Italian smalti together, etc., with each material then grouped by individual shade and value. 

Material within color: For example, material within color being all the blue vitreous along with all the blue Mexican smalti along with all the blue Italian smalti, and possibly any other blue material like ceramic, C3, etc. So, all similar shades and values of blues in the same area, regardless of material. Of course, they would then be grouped by shade and value within the color. 

Which makes more sense to you? How is your studio organized? I welcome your thoughts!


Studio Wing, WIP (cont.)

Okay, so here's the latest on my new studio! It has just been too messy in there to take nice pics, so I waited until they did a cleaning. It's looking fabulous! The walls are up and the trim carpenters are next in line, as well as the air-conditioning. We're getting there, but it's looking like end of July—certainly not end of June, especially since we have to shut down work for a couple of weeks in July while we go on vacation.

View into the studio wing.

Just inside the entry to the studio wing. 

The living area/guest room in the studio wing.

Looking down into the studio from the living area.

At the doorway of the studio.

Inside the studio, looking at what will be my office area in the new gable.

Well, this is just too good to be true! I can't believe the transformation of the attic and space above the garage. I'm going for a spacious, clean, light, and airy decor, so I'm keeping flooring and walls very neutral in color and light in shade. 

I ordered my flooring a few days ago. After much deliberation, I decided on a laminate in White Hickory. I had laminate in my old studio and it actually held up quite well over 18 years. The laminate was on sale, about .30 per sf less than the vinyl that I was considering. I just did not feel like the vinyl would hold up as well under the foot-crushing of pieces of glass and stone. The studio alone is about 1250 sf—AWE-SOME! We're using the same laminate throughout the new wing. 

I've ordered my shelving, thanks to a very generous birthday gift of $$ from my husband and two of my kids. I've also been looking into gallery hanging systems. I have some great new wall space and I love the look and apparent convenience of more professional-looking hanging systems. If anyone has any experience with these, I welcome your advice.

Yes, I'm in that daydreaming, visualizing phase. I'm also in that slightly overwhelmed stage. It will be quite a job to set up a studio of this size—and it's not just the studio, it's the entire space. Then there is also the other end of the house with the new game room. I have not been blogging about that because it's not mosaic-related, but's it's been going on at the same time as the studio wing, although that project is not nearly as complex as the studio wing. We also happen to be replacing our roof and painting the exterior of the house right now. 

Yep, I'm ready for that vacation. But, still not complaining. Okay. Maybe just a bit. But it's all great! 

Before I Was An Artist, #10

Today, there are painters, roofers, and a drywall crew working both outside and inside. Managing the various aspects of our renovation does help keep me busy, but not too busy to miss having a studio and things to make. 

So, I'll busy myself by going back in time to the year 2007 or so in my mosaic career. Having returned from a very rewarding Orsoni master class experience the previous year, I decided to take the step from hobby to art, and I started making art. Intrigued and inspired by Maestro Orsoni's directive to Think Mosaic, which I talked about in this post, I started down a path—although not fully conscious of it at the time—to explore what I have come to think of as work that is essentially mosaic.

Etude, detail (2007) My first attempt to Think Mosaic!

What do I mean by essentially mosaic?  Well, there are three happenings that helped form my idea of work that is essentially mosaic:

1. The first of the three happenings was when Maestro Orsoni said Think Mosaic, and expounded on what was not mosaic (again, refer to this post).

L'entrata, detail

2. The next happening was in 2008 at the SAMA conference in Miami, I believe, and I met Ilana Shafir and her daughter, Leah Zahavi.

I was sitting with a few other mosaic artists in the hotel restaurant when Ilana Shafir and Leah came in and sat down at the table next to us. Maestra Shafir saw that I had a small portfolio of my work with me and she asked to see it. I quite nervously handed it to her. When she saw a photo of L'entrata (left), she said something like If you want to do this kind of thing, you should just paint it! Then, as she viewed a couple of other small, abstract attempts, she said This is honest work. 

3. Finally, I read something Gary Drostle had written about a mosaic in a Mosaic Art Now magazine. I think that it was a juror's choice kind of thing and he was explaining why he chose the particular work. He said something to the effect that it was an excellent example of a work that was essentially mosaic—a work that would not have been as successful in any other medium. 

As a bit of a disclaimer, I'm not heavily invested in the term essentially mosaic or the characterizing adjective of essential. I've only seen it mentioned by Gary Drostle, which either points to my lack of exposure or to a lack of the term's use. As another bit of disclaimer, when I talk about work that is essentially mosaic, I am not referring to a quality characterization, but primarily a type. Work that is essentially mosaic is not necessarily better or more valid that any other kind of mosaic. This is my view.

I'll end this post at this point and let you ponder the idea of essential mosaic, as I have come to understand it based on my recollection of the comments of Orsoni, Shafir, and Drostle.

Before I Was An Artist, #9

Artist - a person skilled at practicing any of the various creative arts.

If I Were A Tree, detail

Since my last post in this series, I've been consciously trying to embrace my new definition of artist and I do believe I've had some success. It's quite reasonable, to me, to change my thinking about something—to change the way I look at it and perceive it—in order to change my experience. Although, I think that there are also other factors contributing to what appears to be my making peace with the label of artist.

My sabbatical, or quasi-sabbatical, from mosaic work has allowed me to get some perspective on my motivation for making mosaics. I've been able to realize that I miss things that I found enjoyable and fulfilling. Actually, what started as a sabbatical, then went quasi, is now back to full sabbatical due to our renovation. I don't even have a studio to choose to not go putter around in. I could not have realized how disorienting it would feel to not even have a studio.  

Another thing that I did last year that I feel has been very beneficial is that I retreated from the online mosaic community—not completely—but to a very large degree. I can't expound on this any further—simply can not—but I do know that it has been helpful. 

So, here I am, sort of on the outside looking in, and maybe it's just easy for me to say that I don't care if I'm an artist or not, or whether I make art or not, or that I've got a handle on my ego, or that I've dispensed with the insecurity that has plagued me since I started thinking of myself as an artist. Easy for me to say when I'm not making anything and putting it out there for others to see. I think that I've made progress, but I truly won't know just how much I've progressed until I get back to it, will I?

And I do want to get back to it! There were times when I was not sure about that, but I am absolutely sure about it now. I so miss making things and I want to make more things! All kinds of things! I want to feel free to make whatever I want to make, and not feel like I have to make art. I've got a lot of making still inside of me, and I've realized that it's the making that I love, not the art.

In my next post, I will try to get back to about 2007, which I said I would do in this post, but did not. It was around this time that I started trying to be an artist, thinking that I was making art. It was an earnest attempt and started off alright. But I ended up someplace that I did not intend. 

Studio Wing, WIP (cont.)

We are now at the end of the 4th week of construction. The studio and studio bath skylights went in on Friday, which was terribly exciting! When I came home from babysitting my two grand-loveys in the late afternoon, things had been cleaned up and looking pretty spiffy.

The next week will finish up the ceiling duct work—it somehow got missed when they were doing the floor work for the studio—and then insulation around the end of the week. Maybe the walls will start going up next week. It's been a busy couple of weeks for me, making tile and floor decisions, among other things. 

Here's where we are at the moment. Let's start with the deck!

This deck is much larger than I had originally envisioned—think balcony—but it kind of took on a life of its own under the influence of our architect. I don't care for the way it extends beyond the roofline, aesthetically speaking, but it's a lovely deck. 

We have jazzed up the deck with a nice lattice of 2' x 4's on the west side. On the east side, we extended the posts up and connected them, giving me a nice place for hanging flower baskets, chimes, and other pretties.

And now for the inside!

At the entry to the studio wing. I decided to move the doorway in further—pretty much straight ahead, instead of where I am standing. This will be an interesting area and I did not want doors swinging around in it.

This pic shows just to the right of the previous pic. There is a nice attic dormer between the two new closets. I'll have some great wall space here.

This is from the doorway into the living area. The kitchen is on the left.

The bath and kitchen have been framed, and you can see the skylight in the bathroom, just to the left.

Just before the entry to the studio. This was taken in the mid-late afternoon. I was so excited to see those skylights going in!

I'm standing at the sliding glass door on the north end of the studio, looking in. 

The transformation of this space is so remarkable! I'm now trying to prepare myself for the fact that it will look smaller once the drywall goes up. Not complaining! This whole project is fantastic and I am loving it—okay, mostly loving it! I'm excited everyday to see what is going to happen. 

That's it for now!

Studio Wing, WIP (cont.)

Reporting in at the end of week 3 here. First, some current exterior pics.

West gable and future office area. Also getting the deck stairway in.

New shade garden area under the deck and stairs. It gets just a bit of late afternoon sun.

East extension. Double window is in the living area and the single window is in the new kitchen.

I'll show the interior progress with before and after shots as I think it makes more sense.

Before we started.

End of week 3.

Before we started.

End of week 3.

Before the kitchen/bath extension.

After extension. I've added those two transparent gray 'walls' to help it make more sense.

Looking toward that new east window. The area will be roughly half bath and half kitchen, with the bath just left of the window.

We now have four holes after a plumber stepped through the garage ceiling. And a water leak from upstairs where my work sink used to be. It had been leaking, quiet little drip by drip, for about 4 days before it snuck through the downstairs study ceiling and made itself known. Stuff happens...

Studio Wing, WIP (cont.)

Good progress was made on the new west gable—I have been mistakenly calling it a dormer—and on the east extension with shed roof—I have been mistakenly calling a gable. Our architect briefly explained the differences and I have a better understanding now. 

One of the insulation crew—at least I think he may be the culprit—stepped through the garage ceiling on Friday. This is getting ridiculous! A few months ago, when we were in the planning stage, an engineer slipped off a beam above the garage and stepped right through, just about a foot or so away from the new hole. On Monday of last week, one of the framers stepped through the ceiling of a small bathroom just off our laundry room, which is right next to the garage. That's three holes now. I hope they get that floor in next week.

Here's progress pics for the past week:

Just getting started on the new west gable at the beginning of the week.

By the end of the day it was in. A smallish window because it's on the west.

End of week and it looks right at home.

The east extension looked a bit scary when they started.

I still had my doubts that this would look alright.

Okay, I feel better. Looks like it could have always been there. 

On a more personal note, I'm finding it to be a challenge to adjust to the new state of things. I'm not complaining, because I am so excited about the changes that we are making, not the least of which is my new studio. I'm guessing that anyone who has undergone a sizable renovation in the house in which they are living might know how I feel. 

I tried to prepare for it, psychologically, as best I could, but I did not completely understand how things would unfold. We are working on three areas of the house: the east end for the new studio wing, a pullman-style bath shared by two upstairs bedrooms, and the game room where my studio used to be. Additionally, due to delays and scheduling issues, it just so happens that our master bath shower is being redone at this time. 

We have a large house but, because of all this work, we are down to one full bathroom and barely two bedrooms. I've moved all of my studio, materials, and tools, as well as all other household storage, into the two guest rooms that we have. Truly, my storage skills are impressive. Because of the work on that pullman-style bathroom, my youngest son's bedroom is uninhabitable. He returns from college this Wednesday and  I've just barely cleared out a small space in the guest bedroom with the one functioning full bath. Kinda crazy! I thought he would be a bit cranky over his summer accommodations, but he surprised me with his good humor about the situation.

And then there is the experience of being without a studio that feels like an empty space, on both the inside and the outside. Although I have not been doing much, mosaically, for almost the last year, it feels very strange to have it all packed up, and to be without the ability to work or putter around. 

Ah well, all is well! It's fascinating to see the new work transform from ideas and drawings on paper to physical reality—just like creating mosaics! Watching the progress, I'm learning things everyday—like the difference between gables and dormers. It's beautiful to see the space upstairs coming alive and opening up! 


Studio Wing, WIP (cont.)

A few more days of dust and loud noises. Yesterday, one of the framers accidentally stepped through a bathroom ceiling. He slipped off a beam up in the attic and punched his foot right through. Down came insulation and drywall, or whatever that puny kind of board is that was used for the ceiling. Stuff happens. 

Here's what I have to show today:

I stepped out onto the deck last evening to take this pic, facing west. Those posts will be for the railing. They waiting on some lumber so they can finish the deck. 

And this looks out onto the east end of the deck. My wide-angle lens distorts things a bit, but this end of the deck is approx. 8' x 7'. 

In this pic, I was standing at the end of the upstairs hall. On the very left, you can see some of the plastic that they put up over stairway entry. We're looking at the new entrance into the studio wing. The entry will be french doors. The framing that you see just inside the attic, almost in the middle, is what remains of the linen closet. Our alarm system is at the top of that wall. Until Advanced Alarms makes it out here on Thursday and moves the panel, that framing has to stay. That grayish, striped wall on the left of that framing, is the stairwell, minus the insulation. 

I'm in the attic space here, looking north-northwest. They have started framing out a new wall and storage area that will be just before the entrance into the studio. This will be studio storage. Because, of course, the studio area of 34' x 12' could not possibly be enough, right? I have so much stuff! Directly opposite this new wall, on the east side, will be the new kitchenette and bathroom. They have to raise the roof, literally, for the kitchen and bath. Can't wait to see that come about!

This photo was shot looking southwest, back toward the entry into the attic. That is a dormer window in the front of the house. I've got two new storage rooms, one on each side of the window, that have been framed out. These are intended for household storage, but I can't make any promises. Although we are losing our very large walk-in attic space for storage, we never used a lot of it. I'm not a hoarder. I'm the opposite of that. I have an aversion to clutter. Except for mosaic materials, I don't believe in keeping stuff. 

It keeps gettin' better...

Studio Wing, WIP (cont.)

Here's the beginning of the construction!

Northwest corner of the garage. They have a good start on the deck. The stairs will start at the base of the closest post and lead up to the extended deck on the left. It's rather tricky to explain. On the east end—the furthest end—the deck is 8' wide; on the closer end, it is about 5' wide. It's a nice-sized deck.

North end of the garage. Here, I was up along that rock retaining wall on the left, shown in the neighboring photo, taking a pic of the north end of the garage. You can see that the new sliding glass door has been installed into the area above the garage. 

Middle of the upstairs hall, looking east. The corner walls of that 4th bedroom have been removed. The framing that is there is temporary. You can see, straight ahead, the doorway into the attic. To the left of the attic doorway, you can see a space that was the linen closet. And now you can also see the back stairway.

Attic entry, looking east. It's difficult to see what's what here, but we're looking into the new living space/guest room area of the studio wing. They have started to frame out some walls and new storage rooms. On the left is the the insulated stairwell. The window will be replaced with a double hung. 

Looking north, above the garage. Not much new here, other than the door at the north end. Initially, I wanted french doors. However, the more I thought about it, I decided that the sliding glass door would be more practical. 

The evening of this day's construction, I was able to walk through the area above the garage for the first time. The framers had put down boards across the beams. I walked through from the attic all the way to the new sliding glass door. I looked out over my new deck, into the trees. Then I turned around and faced into the area that will be my new studio. I realized—I felt— that this area was now a space. This area that we had peered down for 18 years, that seemed rather spooky and dark, that we could not enter for lack of a floor, was now a space. It's as though it had come alive!

Stay tuned...

Studio Wing, WIP

Construction is finally underway to renovate our walk-in attic space and area over our garage to what I am calling the studio wing. We will have a living area/guest room, including kitchenette and full bath, and a studio. All together, it's somewhere around 1100 sq. ft. 

We are also doing a bit of work on what we call the game room. This is a large L-shaped room upstairs. My studio inhabited the small, lower part of the L. I say inhabited—past tense— because I had to clear it out this last weekend. I am currently without studio

The footprint of our house is basically L-shaped. The bottom of the L is the 4-car garage and the very east end of the house. The renovation area is in the bottom of L—the area above the garage and the walk-in attic above the east end of the house. I'll try to blog the progress of the construction of the studio wing as we go along. So, let's get started!

Below are some pre-construction exterior photos:

East side of the house. The lower right shows the first garage door of the 4-car garage. There will be a shed—a dormer-like addition—over the first garage to accommodate the kitchenette and bath. The window that you see is in the walk-in attic space, which will be the living area/guest room.

North end of the garage. That window will be the entrance to my new studio. There will be a sliding glass door where the window is now, and a nice deck with stairs down to the ground level.

West side of the garage. This is the back of the garage. There will be a 12' x 6' dormer in the middle-ish of the garage roof, basically the middle of the studio area. This will really help open up the 34' x 12' shoebox of a studio.

Here is what the interior looks like pre-contruction:

Sorry for the blur. This is from just past the middle of our upstairs hall, looking toward the east. On the left is a door into a bedroom, which will be a casualty of our renovation. We'll be talking out about the eastern half of the room to open up that end of the hallway. The remaining half will be the new linen and storage closet. We'll also add a skylight. Directly ahead is the open door into the attic space over the east end of the house. If you turn the corner and go left, instead of into the attic, there is a linen closet—another casualty— right next to the attic doorway. Then, after the linen closet, there is the back stairway that leads down into the laundry room.

Here, I have walked into the attic and turned to the left, looking north into the area above the 4-car garage. At the end is that window that will be a sliding glass door leading out to the deck. The area from about the end of those vents on the left, to the window at the end of the garage, will be my new studio. On the left, there will be the 12' x 6' dormer. On the right, there will be 3 skylights in the angled roof. The kitchen and bath will be on the right, across from the vents. I'm taking this pic from what will be the living area, and there will be french doors between the living area and the studio.

Since these pics, it's gotten noisy and dusty and crazy—and exciting—around here. I'll be back shortly!

Before I Was An Artist, #7

In my last post in this series, I had made it to the early-mid 2000s. Around 2005, I  had my first website, which was just one of the benefits of having a computer nerd for a daughter. Not many mosaic artists had personal websites at that time, but within just a few years that would change. The internet gradually replaced my well-worn books as a strong source of inspiration, as I searched and increasingly found more mosaic sources online. 

Early in 2005 I found some information—some kind of blog post I believe—about Orsoni's Master Classes. After much thought, I decided to look into attending a 2-week class in June of 2006. This was quite a big thing for me to do, to travel to Venice all by myself, and for 2 weeks! At the time, I had been making mosaics for almost 10 years. However, I knew very little about art. I had no educational background and never really thought of art much beyond it being an aspect of room decor. 

My Orsoni experience proved to be quite pivotal for me and, although I did not know it at the time, started me on the path to becoming an artist

Master Class. 2006. 20" x 16" | 51cm x 41cm. Smalti, mosaic gold.

On left is the mosaic I made in my Orsoni master class. This was a huge challenge for me! First of all, nippers were not allowed in class—only hammer and hardie. I had virtually zero skill with the hammer, which resulted in oh-so-less-than perfect cuts. I fussed and fussed, trying in vain for a degree of precision that was unobtainable. I would try to force myself to accept what were, to me, unacceptable cuts. 

Antonella, observing my frustration, kindly laughed and said something about it being against my nature. It was that perfectionism that I wrote about in my last post, a perfectionism that, up until this point, had been my ally. But in a classroom environment when using new techniques, my perfectionism was proving to be a menace.

I chose the design so that I could learn a little about shading and blending. I could have done a bit of shading with pencil, perhaps, but translating it to individual pieces of color really was a challenge for me. Amazingly, I did get this panel finished before the class ended. 

One day during the class, Lucio Orsoni was showing us around the gallery/showroom which displayed some of his stunning, large-scale gold works, a few of Antonella's pieces, and some other mosaics. One of the pieces was a beautiful portrait, in what I believe was the Venetian double-indirect method, done quite some time ago after a painting. We were all oohing and aahing over it when Lucio said This is not mosaic!  Note that he did not say This is not a mosaic. He explained that it was a copy of a painting—done in service to a painting. At that time, I did not quite understand his point, neither did I understand when, in class, he would say Think mosaic! But, he planted a seed, so to speak. 

Overall, my Orsoni experience was quite positive, and I returned home fully energized and had begun my transformation from hobbyist to artist. From that point on, I was going to make art!

Of course, my first project would be smalti, Orsoni smalti. I had taken a picture from the classroom, which overlooked a balcony, and I decided to mosaic that image. I did my best to recreate that image with as much detail as I possibly could, and it was very, very difficult! I was proud of my accomplishment. 

When Maestro Orsoni told me that my work was technically perfect, well, that was quite a compliment. Too bad that it would be some time before I realized that there was something very important in what he did not say. 

L'entrata. 2007. 42" x 32" | 107cm x 81cm. Smalti.

I love this mosaic and in no way would I say that it is not a good mosaic. I achieved such fine detail and it really is a beautiful piece. Ironically, however, I believe that this work illustrates Orsoni's point when he said This is not mosaic! I had faithfully copied a photograph; the mosaic was created in service to the photo. It is a mosaic, but is it mosaic? This seemingly subtle distinction, as I have come to understand it, gradually revealed itself to me throughout the years of around 2007-2009, and I began to learn to think mosaic in the spirit that I believe Lucio Orsoni meant. 

Well, I think this is enough for one post. I'll continue with 2007 in the next installment.