Before I Was An Artist, #9

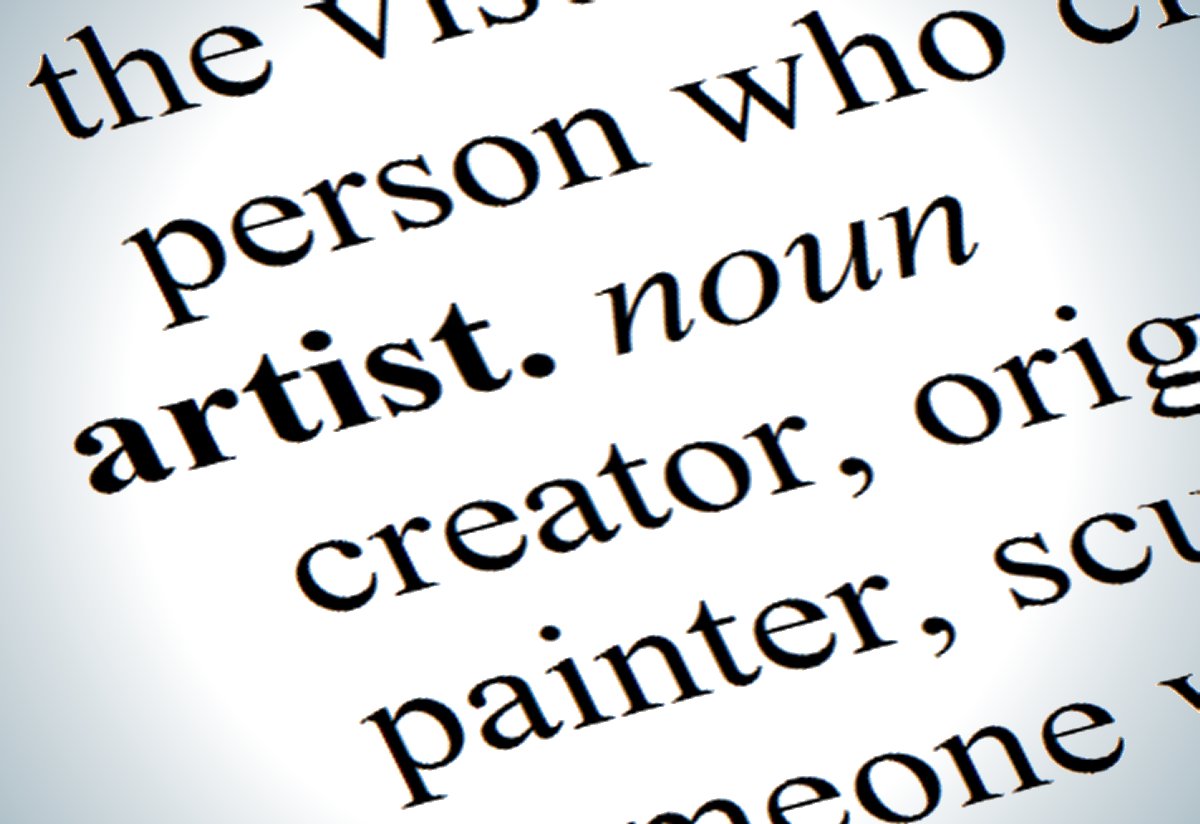
Artist - a person skilled at practicing any of the various creative arts.

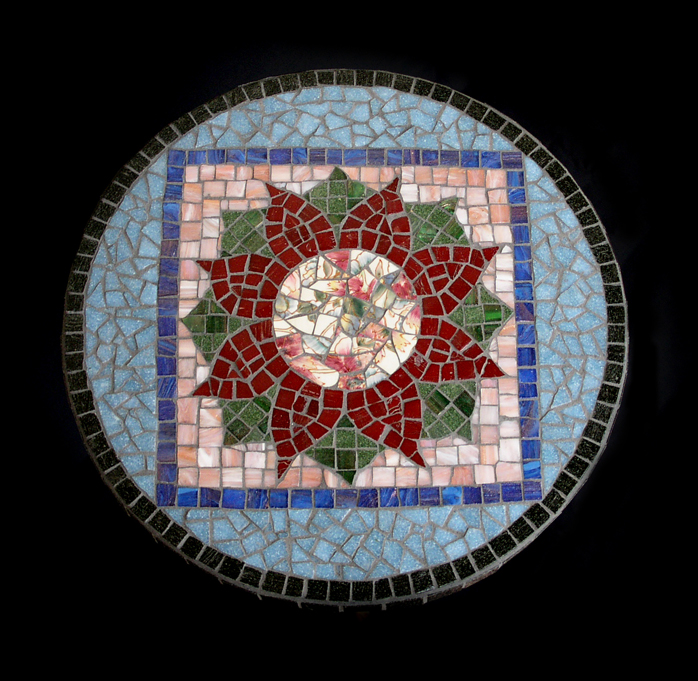
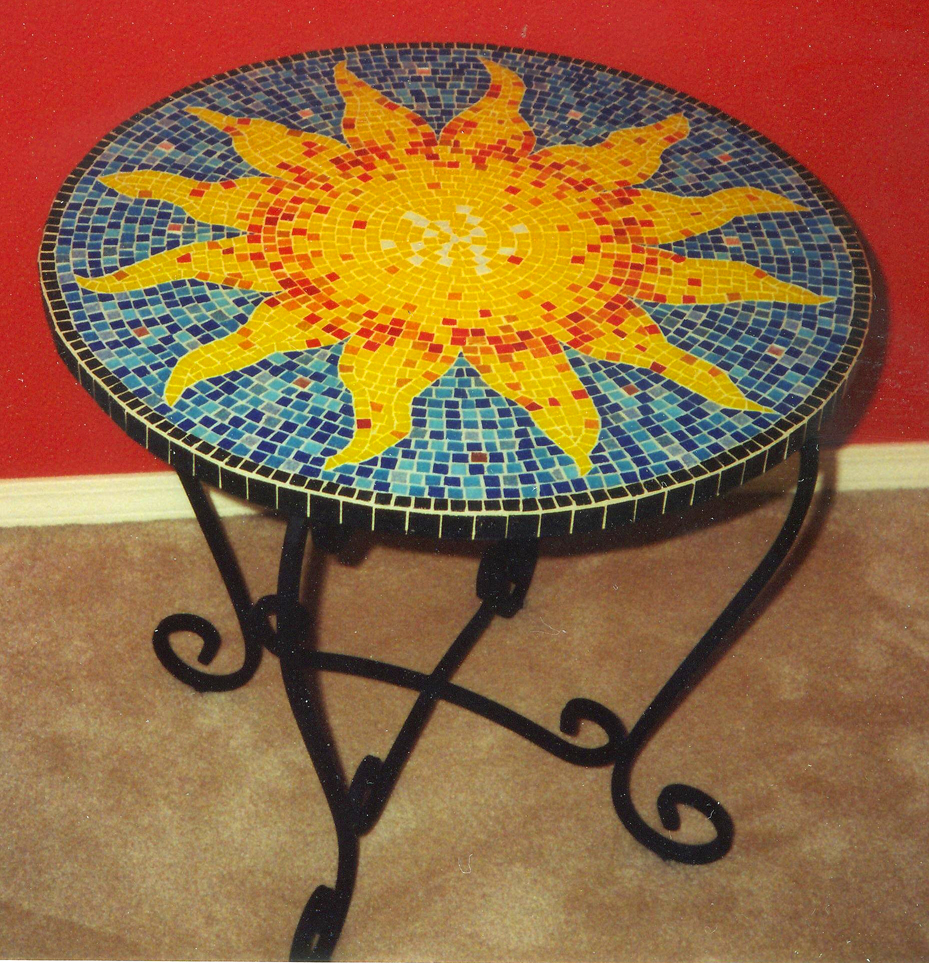
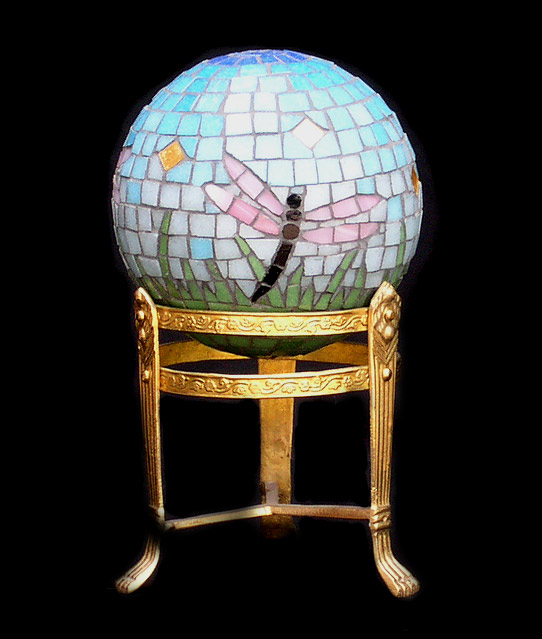
If I Were A Tree, detail

Since my last post in this series, I've been consciously trying to embrace my new definition of artist and I do believe I've had some success. It's quite reasonable, to me, to change my thinking about something—to change the way I look at it and perceive it—in order to change my experience. Although, I think that there are also other factors contributing to what appears to be my making peace with the label of artist.

My sabbatical, or quasi-sabbatical, from mosaic work has allowed me to get some perspective on my motivation for making mosaics. I've been able to realize that I miss things that I found enjoyable and fulfilling. Actually, what started as a sabbatical, then went quasi, is now back to full sabbatical due to our renovation. I don't even have a studio to choose to not go putter around in. I could not have realized how disorienting it would feel to not even have a studio.  

Another thing that I did last year that I feel has been very beneficial is that I retreated from the online mosaic community—not completely—but to a very large degree. I can't expound on this any further—simply can not—but I do know that it has been helpful. 

So, here I am, sort of on the outside looking in, and maybe it's just easy for me to say that I don't care if I'm an artist or not, or whether I make art or not, or that I've got a handle on my ego, or that I've dispensed with the insecurity that has plagued me since I started thinking of myself as an artist. Easy for me to say when I'm not making anything and putting it out there for others to see. I think that I've made progress, but I truly won't know just how much I've progressed until I get back to it, will I?

And I do want to get back to it! There were times when I was not sure about that, but I am absolutely sure about it now. I so miss making things and I want to make more things! All kinds of things! I want to feel free to make whatever I want to make, and not feel like I have to make art. I've got a lot of making still inside of me, and I've realized that it's the making that I love, not the art.

In my next post, I will try to get back to about 2007, which I said I would do in this post, but did not. It was around this time that I started trying to be an artist, thinking that I was making art. It was an earnest attempt and started off alright. But I ended up someplace that I did not intend. 

Studio Wing, WIP (cont.)

We are now at the end of the 4th week of construction. The studio and studio bath skylights went in on Friday, which was terribly exciting! When I came home from babysitting my two grand-loveys in the late afternoon, things had been cleaned up and looking pretty spiffy.

The next week will finish up the ceiling duct work—it somehow got missed when they were doing the floor work for the studio—and then insulation around the end of the week. Maybe the walls will start going up next week. It's been a busy couple of weeks for me, making tile and floor decisions, among other things. 

Here's where we are at the moment. Let's start with the deck!

This deck is much larger than I had originally envisioned—think balcony—but it kind of took on a life of its own under the influence of our architect. I don't care for the way it extends beyond the roofline, aesthetically speaking, but it's a lovely deck. 

We have jazzed up the deck with a nice lattice of 2' x 4's on the west side. On the east side, we extended the posts up and connected them, giving me a nice place for hanging flower baskets, chimes, and other pretties.

And now for the inside!

At the entry to the studio wing. I decided to move the doorway in further—pretty much straight ahead, instead of where I am standing. This will be an interesting area and I did not want doors swinging around in it.

This pic shows just to the right of the previous pic. There is a nice attic dormer between the two new closets. I'll have some great wall space here.

This is from the doorway into the living area. The kitchen is on the left.

The bath and kitchen have been framed, and you can see the skylight in the bathroom, just to the left.

Just before the entry to the studio. This was taken in the mid-late afternoon. I was so excited to see those skylights going in!

I'm standing at the sliding glass door on the north end of the studio, looking in. 

The transformation of this space is so remarkable! I'm now trying to prepare myself for the fact that it will look smaller once the drywall goes up. Not complaining! This whole project is fantastic and I am loving it—okay, mostly loving it! I'm excited everyday to see what is going to happen. 

That's it for now!

Studio Wing, WIP (cont.)

Reporting in at the end of week 3 here. First, some current exterior pics.

West gable and future office area. Also getting the deck stairway in.

New shade garden area under the deck and stairs. It gets just a bit of late afternoon sun.

East extension. Double window is in the living area and the single window is in the new kitchen.

I'll show the interior progress with before and after shots as I think it makes more sense.

Before we started.

End of week 3.

Before we started.

End of week 3.

Before the kitchen/bath extension.

After extension. I've added those two transparent gray 'walls' to help it make more sense.

Looking toward that new east window. The area will be roughly half bath and half kitchen, with the bath just left of the window.

We now have four holes after a plumber stepped through the garage ceiling. And a water leak from upstairs where my work sink used to be. It had been leaking, quiet little drip by drip, for about 4 days before it snuck through the downstairs study ceiling and made itself known. Stuff happens...

Studio Wing, WIP (cont.)

Good progress was made on the new west gable—I have been mistakenly calling it a dormer—and on the east extension with shed roof—I have been mistakenly calling a gable. Our architect briefly explained the differences and I have a better understanding now. 

One of the insulation crew—at least I think he may be the culprit—stepped through the garage ceiling on Friday. This is getting ridiculous! A few months ago, when we were in the planning stage, an engineer slipped off a beam above the garage and stepped right through, just about a foot or so away from the new hole. On Monday of last week, one of the framers stepped through the ceiling of a small bathroom just off our laundry room, which is right next to the garage. That's three holes now. I hope they get that floor in next week.

Here's progress pics for the past week:

Just getting started on the new west gable at the beginning of the week.

By the end of the day it was in. A smallish window because it's on the west.

End of week and it looks right at home.

The east extension looked a bit scary when they started.

I still had my doubts that this would look alright.

Okay, I feel better. Looks like it could have always been there. 

On a more personal note, I'm finding it to be a challenge to adjust to the new state of things. I'm not complaining, because I am so excited about the changes that we are making, not the least of which is my new studio. I'm guessing that anyone who has undergone a sizable renovation in the house in which they are living might know how I feel. 

I tried to prepare for it, psychologically, as best I could, but I did not completely understand how things would unfold. We are working on three areas of the house: the east end for the new studio wing, a pullman-style bath shared by two upstairs bedrooms, and the game room where my studio used to be. Additionally, due to delays and scheduling issues, it just so happens that our master bath shower is being redone at this time. 

We have a large house but, because of all this work, we are down to one full bathroom and barely two bedrooms. I've moved all of my studio, materials, and tools, as well as all other household storage, into the two guest rooms that we have. Truly, my storage skills are impressive. Because of the work on that pullman-style bathroom, my youngest son's bedroom is uninhabitable. He returns from college this Wednesday and  I've just barely cleared out a small space in the guest bedroom with the one functioning full bath. Kinda crazy! I thought he would be a bit cranky over his summer accommodations, but he surprised me with his good humor about the situation.

And then there is the experience of being without a studio that feels like an empty space, on both the inside and the outside. Although I have not been doing much, mosaically, for almost the last year, it feels very strange to have it all packed up, and to be without the ability to work or putter around. 

Ah well, all is well! It's fascinating to see the new work transform from ideas and drawings on paper to physical reality—just like creating mosaics! Watching the progress, I'm learning things everyday—like the difference between gables and dormers. It's beautiful to see the space upstairs coming alive and opening up! 


Studio Wing, WIP (cont.)

A few more days of dust and loud noises. Yesterday, one of the framers accidentally stepped through a bathroom ceiling. He slipped off a beam up in the attic and punched his foot right through. Down came insulation and drywall, or whatever that puny kind of board is that was used for the ceiling. Stuff happens. 

Here's what I have to show today:

I stepped out onto the deck last evening to take this pic, facing west. Those posts will be for the railing. They waiting on some lumber so they can finish the deck. 

And this looks out onto the east end of the deck. My wide-angle lens distorts things a bit, but this end of the deck is approx. 8' x 7'. 

In this pic, I was standing at the end of the upstairs hall. On the very left, you can see some of the plastic that they put up over stairway entry. We're looking at the new entrance into the studio wing. The entry will be french doors. The framing that you see just inside the attic, almost in the middle, is what remains of the linen closet. Our alarm system is at the top of that wall. Until Advanced Alarms makes it out here on Thursday and moves the panel, that framing has to stay. That grayish, striped wall on the left of that framing, is the stairwell, minus the insulation. 

I'm in the attic space here, looking north-northwest. They have started framing out a new wall and storage area that will be just before the entrance into the studio. This will be studio storage. Because, of course, the studio area of 34' x 12' could not possibly be enough, right? I have so much stuff! Directly opposite this new wall, on the east side, will be the new kitchenette and bathroom. They have to raise the roof, literally, for the kitchen and bath. Can't wait to see that come about!

This photo was shot looking southwest, back toward the entry into the attic. That is a dormer window in the front of the house. I've got two new storage rooms, one on each side of the window, that have been framed out. These are intended for household storage, but I can't make any promises. Although we are losing our very large walk-in attic space for storage, we never used a lot of it. I'm not a hoarder. I'm the opposite of that. I have an aversion to clutter. Except for mosaic materials, I don't believe in keeping stuff. 

It keeps gettin' better...

Studio Wing, WIP (cont.)

Here's the beginning of the construction!

Northwest corner of the garage. They have a good start on the deck. The stairs will start at the base of the closest post and lead up to the extended deck on the left. It's rather tricky to explain. On the east end—the furthest end—the deck is 8' wide; on the closer end, it is about 5' wide. It's a nice-sized deck.

North end of the garage. Here, I was up along that rock retaining wall on the left, shown in the neighboring photo, taking a pic of the north end of the garage. You can see that the new sliding glass door has been installed into the area above the garage. 

Middle of the upstairs hall, looking east. The corner walls of that 4th bedroom have been removed. The framing that is there is temporary. You can see, straight ahead, the doorway into the attic. To the left of the attic doorway, you can see a space that was the linen closet. And now you can also see the back stairway.

Attic entry, looking east. It's difficult to see what's what here, but we're looking into the new living space/guest room area of the studio wing. They have started to frame out some walls and new storage rooms. On the left is the the insulated stairwell. The window will be replaced with a double hung. 

Looking north, above the garage. Not much new here, other than the door at the north end. Initially, I wanted french doors. However, the more I thought about it, I decided that the sliding glass door would be more practical. 

The evening of this day's construction, I was able to walk through the area above the garage for the first time. The framers had put down boards across the beams. I walked through from the attic all the way to the new sliding glass door. I looked out over my new deck, into the trees. Then I turned around and faced into the area that will be my new studio. I realized—I felt— that this area was now a space. This area that we had peered down for 18 years, that seemed rather spooky and dark, that we could not enter for lack of a floor, was now a space. It's as though it had come alive!

Stay tuned...

Studio Wing, WIP

Construction is finally underway to renovate our walk-in attic space and area over our garage to what I am calling the studio wing. We will have a living area/guest room, including kitchenette and full bath, and a studio. All together, it's somewhere around 1100 sq. ft. 

We are also doing a bit of work on what we call the game room. This is a large L-shaped room upstairs. My studio inhabited the small, lower part of the L. I say inhabited—past tense— because I had to clear it out this last weekend. I am currently without studio

The footprint of our house is basically L-shaped. The bottom of the L is the 4-car garage and the very east end of the house. The renovation area is in the bottom of L—the area above the garage and the walk-in attic above the east end of the house. I'll try to blog the progress of the construction of the studio wing as we go along. So, let's get started!

Below are some pre-construction exterior photos:

East side of the house. The lower right shows the first garage door of the 4-car garage. There will be a shed—a dormer-like addition—over the first garage to accommodate the kitchenette and bath. The window that you see is in the walk-in attic space, which will be the living area/guest room.

North end of the garage. That window will be the entrance to my new studio. There will be a sliding glass door where the window is now, and a nice deck with stairs down to the ground level.

West side of the garage. This is the back of the garage. There will be a 12' x 6' dormer in the middle-ish of the garage roof, basically the middle of the studio area. This will really help open up the 34' x 12' shoebox of a studio.

Here is what the interior looks like pre-contruction:

Sorry for the blur. This is from just past the middle of our upstairs hall, looking toward the east. On the left is a door into a bedroom, which will be a casualty of our renovation. We'll be talking out about the eastern half of the room to open up that end of the hallway. The remaining half will be the new linen and storage closet. We'll also add a skylight. Directly ahead is the open door into the attic space over the east end of the house. If you turn the corner and go left, instead of into the attic, there is a linen closet—another casualty— right next to the attic doorway. Then, after the linen closet, there is the back stairway that leads down into the laundry room.

Here, I have walked into the attic and turned to the left, looking north into the area above the 4-car garage. At the end is that window that will be a sliding glass door leading out to the deck. The area from about the end of those vents on the left, to the window at the end of the garage, will be my new studio. On the left, there will be the 12' x 6' dormer. On the right, there will be 3 skylights in the angled roof. The kitchen and bath will be on the right, across from the vents. I'm taking this pic from what will be the living area, and there will be french doors between the living area and the studio.

Since these pics, it's gotten noisy and dusty and crazy—and exciting—around here. I'll be back shortly!

Before I Was An Artist, #7

In my last post in this series, I had made it to the early-mid 2000s. Around 2005, I  had my first website, which was just one of the benefits of having a computer nerd for a daughter. Not many mosaic artists had personal websites at that time, but within just a few years that would change. The internet gradually replaced my well-worn books as a strong source of inspiration, as I searched and increasingly found more mosaic sources online. 

Early in 2005 I found some information—some kind of blog post I believe—about Orsoni's Master Classes. After much thought, I decided to look into attending a 2-week class in June of 2006. This was quite a big thing for me to do, to travel to Venice all by myself, and for 2 weeks! At the time, I had been making mosaics for almost 10 years. However, I knew very little about art. I had no educational background and never really thought of art much beyond it being an aspect of room decor. 

My Orsoni experience proved to be quite pivotal for me and, although I did not know it at the time, started me on the path to becoming an artist

Master Class. 2006. 20" x 16" | 51cm x 41cm. Smalti, mosaic gold.

On left is the mosaic I made in my Orsoni master class. This was a huge challenge for me! First of all, nippers were not allowed in class—only hammer and hardie. I had virtually zero skill with the hammer, which resulted in oh-so-less-than perfect cuts. I fussed and fussed, trying in vain for a degree of precision that was unobtainable. I would try to force myself to accept what were, to me, unacceptable cuts. 

Antonella, observing my frustration, kindly laughed and said something about it being against my nature. It was that perfectionism that I wrote about in my last post, a perfectionism that, up until this point, had been my ally. But in a classroom environment when using new techniques, my perfectionism was proving to be a menace.

I chose the design so that I could learn a little about shading and blending. I could have done a bit of shading with pencil, perhaps, but translating it to individual pieces of color really was a challenge for me. Amazingly, I did get this panel finished before the class ended. 

One day during the class, Lucio Orsoni was showing us around the gallery/showroom which displayed some of his stunning, large-scale gold works, a few of Antonella's pieces, and some other mosaics. One of the pieces was a beautiful portrait, in what I believe was the Venetian double-indirect method, done quite some time ago after a painting. We were all oohing and aahing over it when Lucio said This is not mosaic!  Note that he did not say This is not a mosaic. He explained that it was a copy of a painting—done in service to a painting. At that time, I did not quite understand his point, neither did I understand when, in class, he would say Think mosaic! But, he planted a seed, so to speak. 

Overall, my Orsoni experience was quite positive, and I returned home fully energized and had begun my transformation from hobbyist to artist. From that point on, I was going to make art!

Of course, my first project would be smalti, Orsoni smalti. I had taken a picture from the classroom, which overlooked a balcony, and I decided to mosaic that image. I did my best to recreate that image with as much detail as I possibly could, and it was very, very difficult! I was proud of my accomplishment. 

When Maestro Orsoni told me that my work was technically perfect, well, that was quite a compliment. Too bad that it would be some time before I realized that there was something very important in what he did not say. 

L'entrata. 2007. 42" x 32" | 107cm x 81cm. Smalti.

I love this mosaic and in no way would I say that it is not a good mosaic. I achieved such fine detail and it really is a beautiful piece. Ironically, however, I believe that this work illustrates Orsoni's point when he said This is not mosaic! I had faithfully copied a photograph; the mosaic was created in service to the photo. It is a mosaic, but is it mosaic? This seemingly subtle distinction, as I have come to understand it, gradually revealed itself to me throughout the years of around 2007-2009, and I began to learn to think mosaic in the spirit that I believe Lucio Orsoni meant. 

Well, I think this is enough for one post. I'll continue with 2007 in the next installment.

While I'm Not Being An Artist

During my mosaic sabbatical, I've been so very busy not being an artist. I hope to have installment #7 in my Before I Was An Artist series out in the next few days. So, what have I been up to?

Still cooking, literally, and so thoroughly enjoying it! How fabulous! How could I have gotten into my mid-late 50s and just be discovering how satisfying it is to be acquiring some kitchen competence? For the last 3+ weeks I have been focusing on vegan dinners because my husband is doing that very long Easter fast; Orthodox Easter is still about 4 weeks away. So I've been pretty much vegan myself, using a bit of dairy and eggs. I'm discovering great vegan substitutes and learning some things. We have not suffered in the least.

I'm enjoying my two grandsons immensely, one 2 and one 4. We had an Easter Egg Hunt here for them on Easter afternoon. Sean, the 4-year-old, and his Mom had decorated 11 hardboiled eggs for the hunt and also brought some of those plastic eggs with a chocolate treat inside each. My daughter and son-in-law hid the eggs around the property—in the woods and garden and yard. I accompanied Sean on the hunt and when we came upon one of the decorated eggs, he would just walk right by and say "Those aren't the kind of eggs I'm looking for." He would only pick up the plastic ones with the candy inside. A no-nonsense kind of fellow!

There is progress on the renovation front! We have finalized our plans and the construction will start any day now. I'm so excited about my new studio, which makes perfect sense for someone who is trying not to be an artist. Well, I'll take some pics as the project progresses. 

Another thing I've been doing while I'm not being an artist is to work on that 6-year-old mosaic that I wrote about some weeks ago (see here). Yes, it is very strange that someone who is on a mosaic sabbatical and not making art would spend time finishing a mosaic. But I've been spending time here and there working on this thing. If you recall, I had to do a sort of reset on it after having somehow wandered away from the original concept. 

To refresh your memory, I've reposted the pics from my earlier post. 

Rough drawing of the 30" x 30" very simple, repeating pattern. It is basically 9 squares, each 9" x 9", with an approx. 1.5" border around the edge.

Rough drawing of the 30" x 30" very simple, repeating pattern. It is basically 9 squares, each 9" x 9", with an approx. 1.5" border around the edge.

Original work done on one of the 9" squares, which I concluded was the wrong approach some 6+ years ago.

Original work done on one of the 9" squares, which I concluded was the wrong approach some 6+ years ago.

Back in February, I scraped off the original attempt and repaired the substrate, which you can see in the lower left corner of the image below. Then I spent a few weeks getting things ready for the new direction, repainting the sides of the gold lines, cutting marble, etc. Finally, I started working on it an hour here, a couple of hours there, some days not at all, really trying not to get too absorbed in it.

You can see that I've got quite a reset going on here. I chose a dark background with red for the sides of the lines to boldly exploit the basic concept.

I've got the contrast that I needed for the repeating pattern of gold lines, and the red sides of the lines really stand out when changing viewing perspective. 

I'm leaving a gap, almost 1/8", between all the implied triangles within the 9 squares, creating shadow lines which both connect and separate as they define squares, triangles, and diamond shapes.

It's really a very simple design, isn't it?

I'm getting some great practice using the hammer, cutting the marble into the roughly 1/4" square pieces, although I am using nippers to shape them up and cut the diagonals. Still, my right hand is fine and seems to have recovered from my injury last spring. 

Below are a couple of detail shots on which you can click to zoom. 

It's quite a tedious project and, at this point, not much more than a technical challenge. But, in that sense, it seems a good fit for me at this time. I need to be making something and working with my hands. I think I'll actually get this finished, eventually, probably this year. And I think I'll like it, and I will be happy that I did not give up on it. 

And that's a worthy goal, don't you think? Whatever you're making, and whether or not you're an artist. Just to like what you make and be happy that you made it. 

Before I Was An Artist, #5


Do you have trouble fitting into the label of artist? It feels quite natural for some people, but it has never felt like it fit me. 

As useful as labels are for us human beings, I've always been challenged to own a label but not identify with it. My idea of, and relationship to, the label of artist needs some work. And I may be onto something.


Thoughts on being fearless...

In my first years of mosaic-making, I was fearlessly ambitious, the way that a child is fearlessly ambitious. They have no fear because they don't know to be afraid. It's that ignorance of bliss, Garden of Eden kind of fearless. The unknowns are unknown, not even suspected. What a wonderful place from which to operate!  Children accomplish astonishing growth and mastery in their first few years of life, of which no small part must be due to being free of fear. 

As an adult, is it possible to truly be fearless? We talk about feeling the fear and doing it anyway, but I'd rather not feel it - not as it regards making mosaics. (Being uncomfortable identifying as an artist, I'll also refrain from saying that I make art. I'll just be a mosaicist and say that I make mosaics.) In trying to free myself of the artist label, to un-become an artist, I realize that I am really just trying to find a way to be fearless again.

We carry real and imagined critics with us constantly—a veritable babble of voices, some remembered, some prophesied, and each eager to comment on all we do. Beyond that, even society’s general notions about artmaking confront the artist with paralyzing contradictions... You’re expected to make art that’s intimately (perhaps even painfully) personal—yet alluring and easily grasped by an audience that has likely never known you personally.

When the work goes well, we keep such inner distractions at bay, but in times of uncertainty or need, we begin listening. We abdicate artistic decision-making to others when we fear that the work itself will not bring us the understanding, acceptance and approval we seek.
— David Bayles & Ted Orland, Art & fear

Of course, it's not really about the label itself—although I recognize that it's quite a loaded idea to me, or whether what I am making is or is not art—as that is not for me to decide. It's about how my relationship to mosaic-making changed as I started thinking in terms of being an artist and of making art. And it's not as though it was, in and of itself, a bad thing. It wasn't. Until it was. And it was necessary. Until it wasn't. 

Well, I just needed to wander off and ponder fearlessness. I'll go back to the early to mid-2000s in my next post, which would lead me out of the blissful ignorance of my small private mosaic world and into the public world of the blossoming mosaic community.


Before I Was An Artist, #4

Circa 1997. I was pretty obsessed with mosaic. I saw mosaic everywhere. Either something could be transformed by mosaic, or it could be broken up and used for mosaic material. I wasn't an artist; mosaic was just an obsessive hobby. 

After my first birdbath, I decided that I would just make birdbaths - for forever. I made two more, and realized that forever had come not soon enough. I was ready to not make anymore birdbaths. I resumed my exploration of material and style via primarily decorative pieces. 

Stained glass caught my attention. It was relatively easy to find, to cut, and it was inexpensive. It was at a stained glass shop that I first found wheeled nippers. Wow! What an invention. I took a few stained glass classes to learn how to cut glass and I was off in that direction for a while, trying a lot of glass-on-glass stuff, certain that I would do that for the rest of my life.

There was my picassiette phase. I loved the chunkiness and mixed patterns of broken dishes and ceramics. Yes, I bought things just to break them up for material. Playing with picassiette led me to bottles, which still hold a bit of interest for me. 

By around 2000, I started focusing a bit more in the wall panel direction and ventured to make a few largish ones, one being a portrait for which I was woefully inadequate. But it never occurred to me that I did not know what I was doing, so I gave it a shot.

Fearlessly ambitious and deficient in both self-doubt and expertise from which to judge my success, I enthusiastically charged ahead. Though accomplishing much more technically than artistically, due to the sheer act of physically doing it, my ability to assess my own work was quite limited. While books offered a few tips and critiques, I was mostly oblivious to my technical errors. Still, I was growing, in that unconscious way that is a by-product of just making one thing after another. It was unavoidable, I suppose, that I would slowly and quite by accident be likewise growing artistically, learning a bit about line, composition, perspective, and color.

Looking back, I see that I was very content to just be making things. But then, my mosaic world was quite small. It was just me. I was not part of any mosaic community. SAMA was not in existence until 1998 or so, and there was no Facebook or CMA (not sure when MAO was formed). I was probably still ordering tiles by phone, although I recall the perfect joy of spending time in local tile stores and home improvement stores like the no longer Builder's Square. What fun!

My, how things would change in the next decade! Suppliers would be online, and the internet would be bringing the work of mosaicists from all over the world into my own home, my own studio. 

Before I Was An Artist, #3

Yes, so, what happened last week...

With the holidays well behind me and the adult kids back to their lives, the house was quiet again. I decided it was time to clean my studio, which had become rather piled up with remnants of the Thomas decorations - spray paint, axles and wheels that I made out of hardware for the snack train, railroad track cutouts, etc., a couple of wood specimens in need of some preservation, shale specimens that I was... am... continuing to collect from our woods when out with the dog - basically, just stuff, the kind of stuff that seems to pile up. 

While cleaning I came across 5 unfinished mosaics that I was confronting for not at all the first time. The oldest one was from 6 years ago and, although I muddled the idea of it early in its execution, I could never give up on it. I thought it was a cool idea when I started it, and every time I found myself considering what to do about it, I still thought it was a cool idea. Last year, I decided to either come up with a way to make this cool idea work or give up on it and throw the dang thing away. So I rethought it and came up with a reset plan. Unfortunately, it was about the time that I was running out of mosaic fuel so I turned my back on it yet again.


So here it is at right, my 6 year old neglected concept. A simple repeating pattern of lines in a grid of 9" x 9" squares - beautifully geometric, implying all those triangles and teasing other angular shapes. Just my kind of thing. The lines are in bumpy gold, raised on thin wooden rods, so the gold lines will extend above the surface of the mosaic. The sides of the gold lines were painted (brown, hmm...), which I thought would give a lot of interest from different views and the bumpy gold would reflect those elegant lines.

For some mysterious reason, I proceeded to use a mix of light, neutral tess, cut very intricately (as you can see in the lower image), kind of like an overhead city view, with little crystals, shells, minerals imbedded. I got one of the 9 squares done like this, and then I think I got distracted with a big commission. By the time I was revisiting it, I realized that I had muddled the concept, needed more contrast, and there was no way in hell that I was going to do 30 square inches in that ridiculously intricate work. 


Click on image to zoom.


Last week, I decided that it still has potential to be a very striking work, just the kind of thing I would love, so it's a keeper. Two other of the 5 should also be finished, I concluded. One of the 5 should be abandoned - just tossed, and the last one should first be cannibalized for it's good mineral specimens and then abandoned. Will I actually finish any of the 3? I have no idea, but I do feel a spark of interest. 

I found myself puttering around in my studio in the following days, not for any length of time. It felt so good to be puttering in my studio. The idea of maybe doing something to contribute to that 6 year old mosaic reaching its glorious potential slowly started becoming less repulsive, then palatable, then, well, let's just see if I can get that stuff scraped off and then reassess the situation.

Over the weekend, I scraped and yanked the beautifully and intricately cut, and completely wrong, marble from the Wedi substrate, pulling up most of the fiberglass mesh and foam core along with it. I had doubled the Wedi, which was working to my advantage these 6 years later, and the damage was isolated to about a 9" square corner. I was able to salvage a lot of the foam, pieced it back into the hole, and secured it with Weldbond. After it dried, I finished patching with thin set. After sanding it down, it's almost good as new. I've got to change something else to accommodate my reset plan, and then I'll see if its time may have come.

Let's not get carried away. I'm still on sabbatical, although I may qualify it as a sabbatical from any new work. Although I have some ideas percolating - all because I finally went in to clean up my studio last week - I don't think I'm where I need to be to birth anything new. My head is not on straight yet. Mosaic just became so consuming, I feared more an escape than an expression. I don't want to get lost again. I don't want to do it for the wrong reasons. I don't want to make anything that doesn't truly need to be made.

But maybe I can finish something that needs to be finished... 


Before I Was An Artist, #1

This is the first post in what I intend to be a series of posts reflecting on my journey to becoming, and un-becoming, an artist. Since Spring of 2015, when I decided to take a break from my work and sort out my relationship with it, I began the un-becoming leg of the journey, and I'm realizing that it actually has very little to do with mosaic-making.


In recent years, I've struggled under the weight of the artist label. I spent the first 45+ years of my life with no connection to the label whatsoever. I never thought of myself as an artist, nor did I have such a desire. I hardly considered myself a creative person at all. I did not even think about art very much, other than it being something decorative to support a room or an activity that children did for fun in school.

Somewhere around 1996 we began the adventure of building a house. In short order, we found ourselves watching HGTV on the weekends and getting all kinds of ideas. This is how I was introduced to mosaic in any serious, non-Pier 1 Imports sort of way. Some show on gardens of Barcelona led to me being convinced that I must have a mosaicked fireplace surround in what would be my husband's study in the new house.

So, that's how it started. One thing led to another, and I decided to try my hand at making a mosaic. Between my first rather pitiful attempt, at right (Why did I arrange those leaves like that? Why did I grout it with white non-sanded? God bless grout colorant.), and the fireplace, I dove right into the mosaic pool and made as many mosaics as I could figure how to make.

I bought and studied mosaic books from local bookstores. I figured out where to buy materials before they were all over the internet. I experimented with substrates and adhesives. I learned to cut with traditional tile nippers - I did not find wheeled nippers for a couple of years. I learned some things not to do. 


Sunflower. 2' x 2'. First mosaic attempt. 1995 - 1996. Ceramic and porcelain pool and floor tiles. 

Sunflower. 2' x 2'. First mosaic attempt. 1995 - 1996. Ceramic and porcelain pool and floor tiles. 

At left, my very first experiments with smalti, which I ordered by phone from Mountaintop Mosaics. I knew that I wanted to do the fireplace in smalti, but it took some time before I found some and was brave enough to use it. I combined the smalti with unglazed porcelain (bathroom tiles), some pool tile, and a bit of gold. Designs were inspired by some illustrations in a book. I was not yet a year into mosaicking.


About a year later, as we moved into our new home, I was convinced that I was the person to mosaic that fireplace surround. And I did. It turned out okay - quite well, actually, considering my experience level. It has its issues - how could it not? Funny, because when I look at it, I don't see its problems. When I look at it, I remember the person who took it on without any fear or insecurity - that person who wasn't an artist.

Tropical Fireplace Surround 1996-1997. Smalti, mosaic gold.

Below is a slideshow of a few of the things I made in that first year. The kitchen table originally had 4" x 4" white ceramic tiles and a light wood finish. Another example of me just jumping in without fear or even a second thought. I used mostly pool tiles and some off-white ceramic tiles that I bought from a local tile store. Once all pieces were glued, I proceeded to grout it with antique white grout. What a disaster! Fortunately, I found some grout colorant in the color Haystack which saved it. Well, it's not perfect, but we still use it in our kitchen.

As can be seen, I was not making anything all that spectacular - mostly decorative things for around the house and small wall panels inspired by others' designs. I relied somewhat heavily on stencils for the fireplace design. Well, this was all before I was an artist... and I was having a blast!


MESI Winners!

Congratulations to Mindy Graber and Tracy Hodson as the MESI Scholarship winners! For the 2016 American Mosaic Summit, each will receive a full-registration and workshop of their choice.

Also, thanks to Krystie Rose Millich, an additional $1300 (more or less)  in expense $$ has been raised to assist with additional conference expenses. 

I am so looking forward to hearing back from them about their conference experience!